I’ve had a couple of class members ask me for instructions on how to migrate their blog to another WordPress hosting service (like WordPress.com) or delete their blog. While I believe there is significant value in having a public presence on the internet that showcases your work from UVic that could be helpful when you start your job search, I also completely understand why some would either like to take down some of their blog posts or take down their blog completely. That said, below are instructions on how to:
- Backup your blog post to your local hard drive (which you should do no matter what).
- Leave your blog on OpenEd.ca and take down some posts.
- Migrate your blog to WordPress.com and delete your OpenEd.ca blog.
- Delete your OpenEd.ca blog, and back up your blog posts on your hard drive.
1. Backup your blog posts to your hard drive for safekeeping
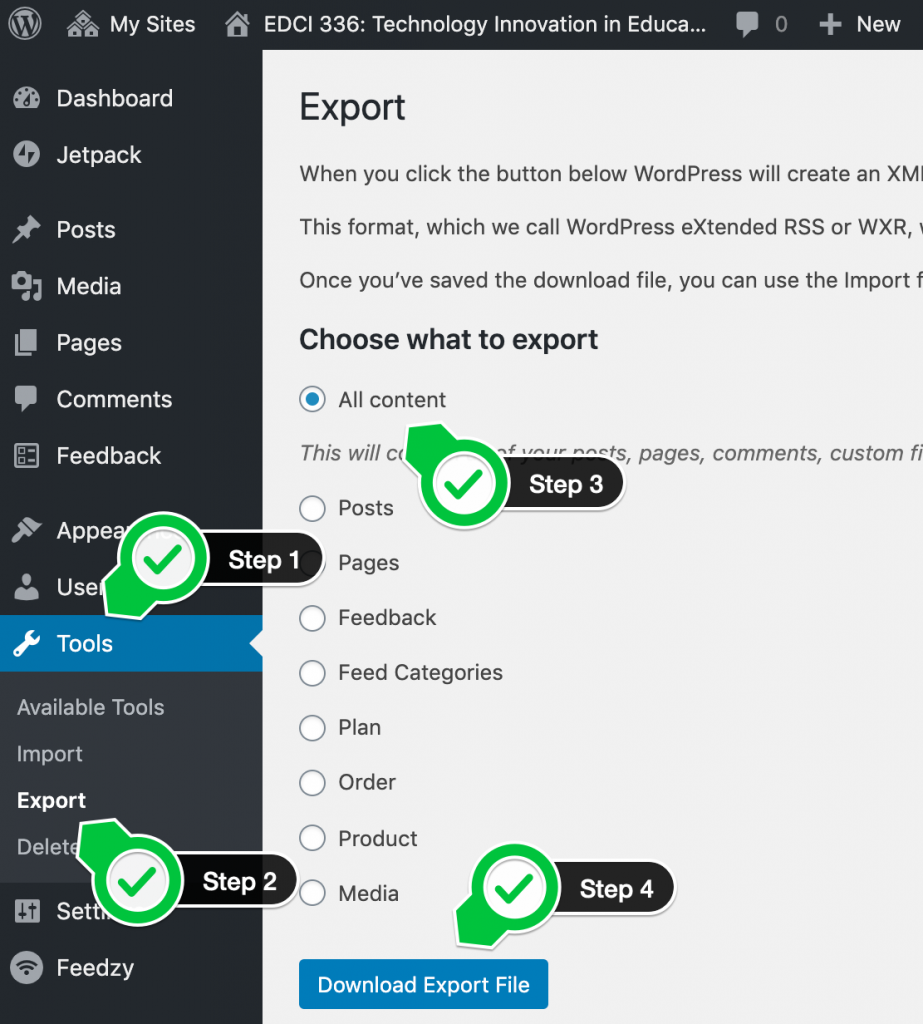
- Log in to your blog and click on the Tools menu on the left navigation bar.
- Click on the Export button below the Tools menu on the left navigation bar.
- Click on the All content radio button in order to export your complete blog, including all posts, pages, feedback and media.
- Click on the Download Export File button.
- Select a location on your hard drive to back up your blog posts. Preferably this will be a location that will be backed up in the cloud, like a Google Drive folder, and iCloud folder, or Dropbox folder.
2. Leave your blog on OpenEd.ca and take down some posts
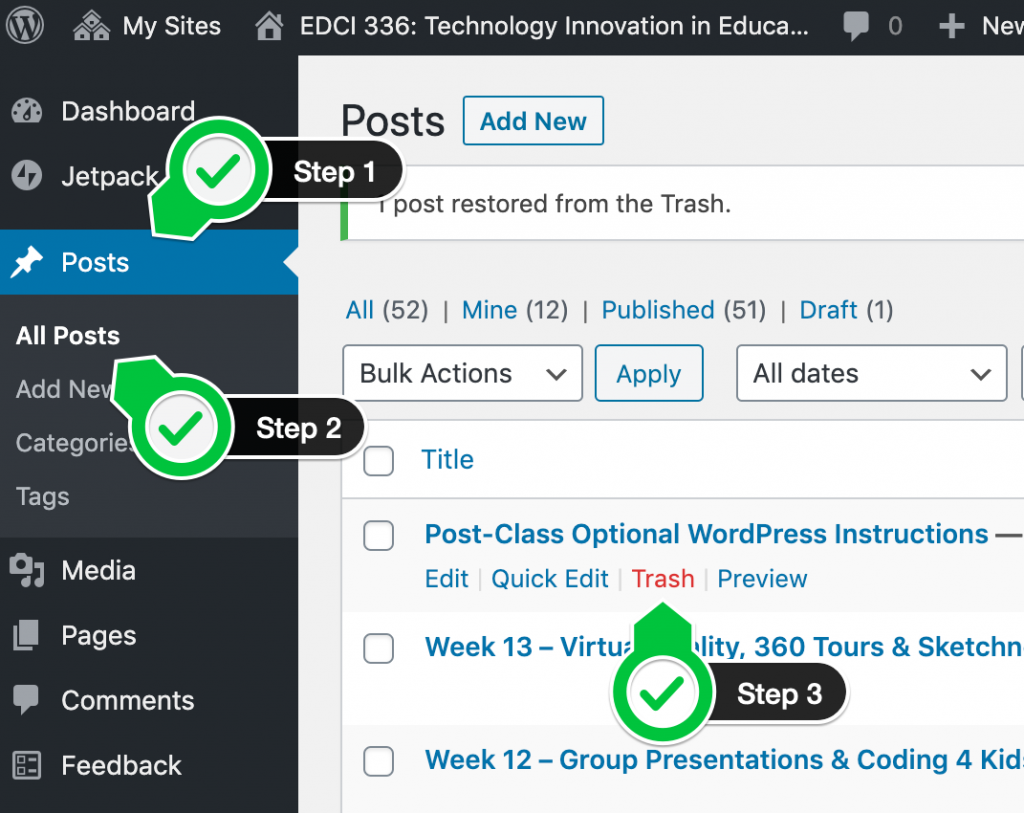
- Log on to your blog, and click on the Posts button on the left side of the screen.
- Click on the All Posts button, and then find the blog post(s) that you would like to delete.
- Mouseover a blog post that you would like to delete. Press the red Trash button that appears.
- Find any other blog posts that do not showcase your talents and abilities, and delete them as well.
3. Migrate your blog to WordPress.com
- Log in to your OpenEd.ca blog and click on the Tools menu on the left navigation bar.
- Click on the Export button below the Tools menu on the left navigation bar.
- Click on the All content radio button in order to export your complete blog, including all posts, pages, feedback and media.
- Click on the Download Export File button.
- Select a location on your hard drive to back up your blog posts. Preferably this will be a location that will be backed up in the cloud, like a Google Drive folder, and iCloud folder, or Dropbox folder.
- Follow these instructions to create an account and free website at WordPress.com: https://www.lifewire.com/start-free-blog-at-wordpress-3476412
- Follow these instructions to import your backed up OpenEd.ca website into your new WordPress.com website: https://wordpress.com/support/import/
NOTE: See tutorial #1 above if you haven’t already backed up your OpenEd.ca website. - Once your website is up and running on the new platform you can then delete your OpenEd.ca website by following the steps below.
4. Delete your OpenEd.ca blog, and back up your blog posts on your hard drive
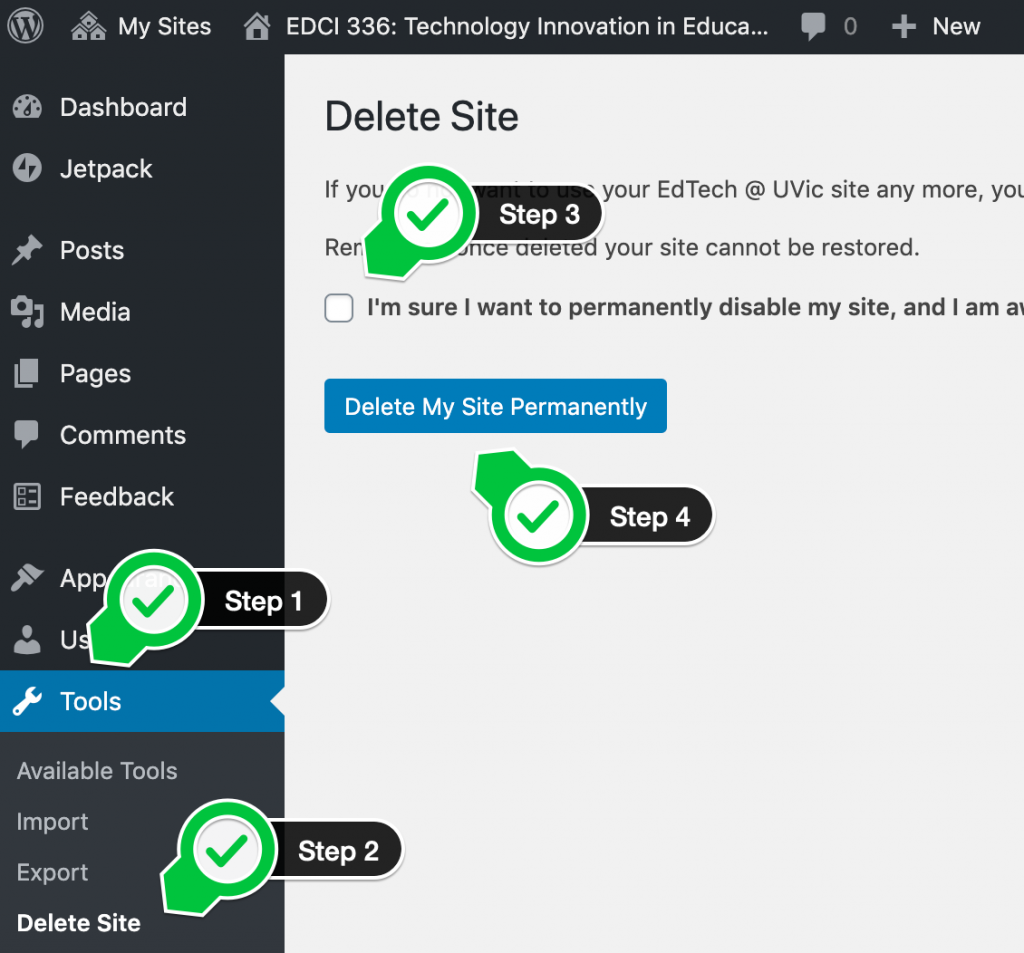
- Log on to your blog, and click on the Tools button on the left side of the screen.
- Click on the Delete Site button.
- Click the checkbox to the right of the text that says, “I’m sure I want to permanently disable my site…”.
- Click on the blue Delete My Site Permanently button.
- You will receive an email asking you to click on a link in the email to confirm that you want to delete your website.
NOTE: If you do not receive the confirmation email, please email the web address of your blog to rmccue@uvic.ca and I will contact the webserver to delete it manually.

Leave a Reply